I’ve wanted to share in depth about my van for quite a while- including pictures and all of the little things I’ve learned that make traveling in it easier. This turned into a fairly long post, but I hope it may provide some value to other people with Class B RVs or perhaps be a topic of interest for others. Some of the things I share are pretty specific to my van, some may be specific to the brand and others may be useful for any Class B or other type of RV. If you’re just curious about what the van looks like inside, you can just scroll through to see the pictures.
This post does contain links to some products on Amazon. I am an Amazon Affiliate meaning that if you click through the link and buy something, they pay me a little. Amazon has a gazillion products and I only link to the few I really love.
I started this post before the engine blew up. I thought I would finish this post despite the fact that the van is now sitting in Snyder, Texas waiting for me to figure out what to do with it. I am now back home without it. (Despite the fact that I adore it, I am honestly leaning towards selling it.)
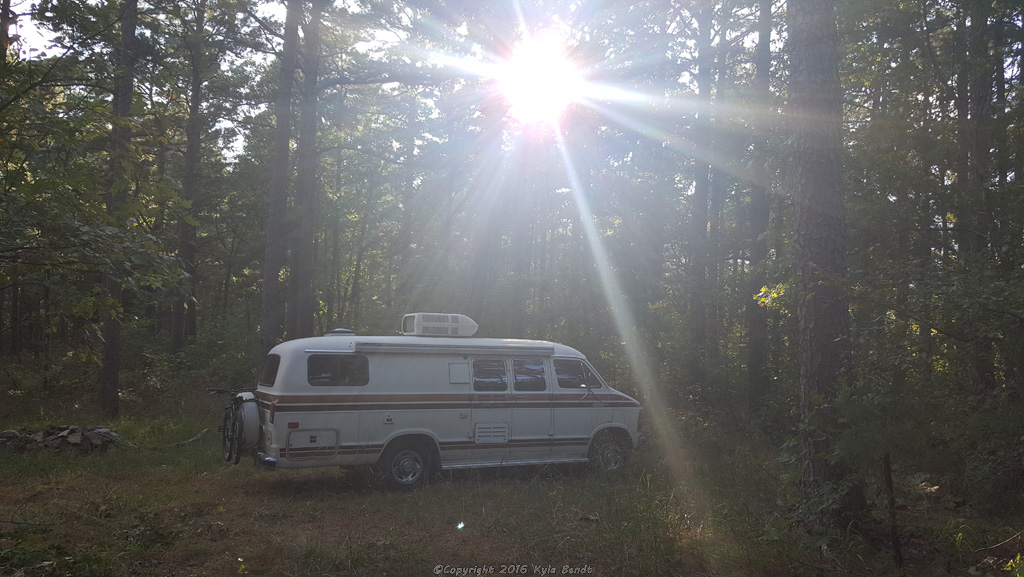
I’ve put off really posting pictures of it for months because I want everything to look just perfect. I finally decided that probably nobody cares and I would just take the pictures. These pictures were all taken during the middle of a two week trip with the van, so this is what it really looks like when I’m on the road. For reference my van is an Xplorer 228 built on a 1984 Dodge B350 base. You can check out the floor plan and pictures from the day I bought it in my post about my van.
It is fairly tidy in the pictures, and it doesn’t stay that way all the time. It’s easy for a few things to make it look like one giant mess since there isn’t much space. That is one of the reasons that I tidy up a few times a day. Another is just so that things don’t go flying, sliding or falling when I drive down the road. My number one tip is probably to keep things clean and to have a spot for everything. Bringing along a minimum amount of stuff helps a lot too. This is something I’ve gotten better at over the years. There’s not a lot of space to really store extra stuff, and when I have brought too much, I end up sleeping next to it.
Parking
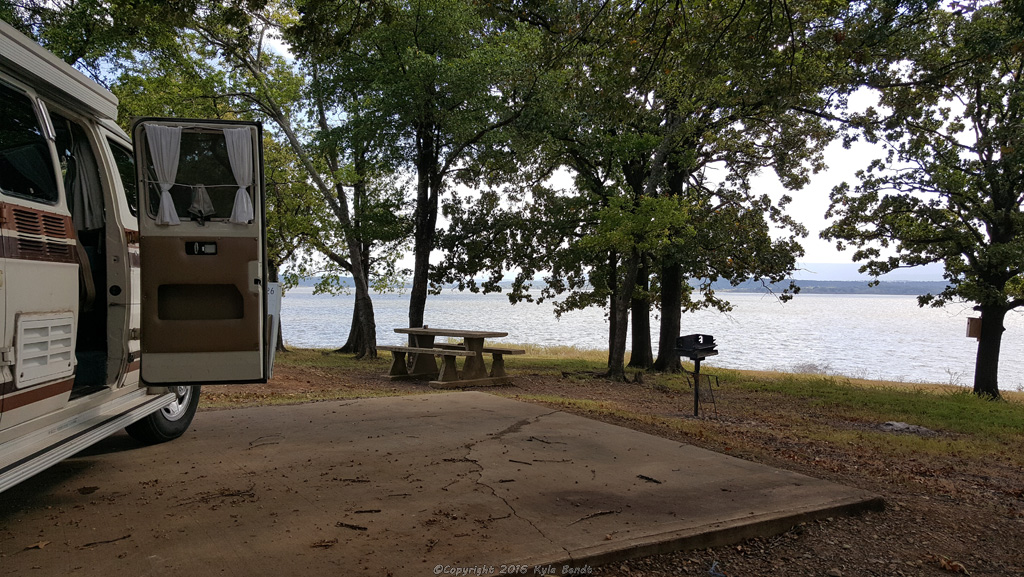
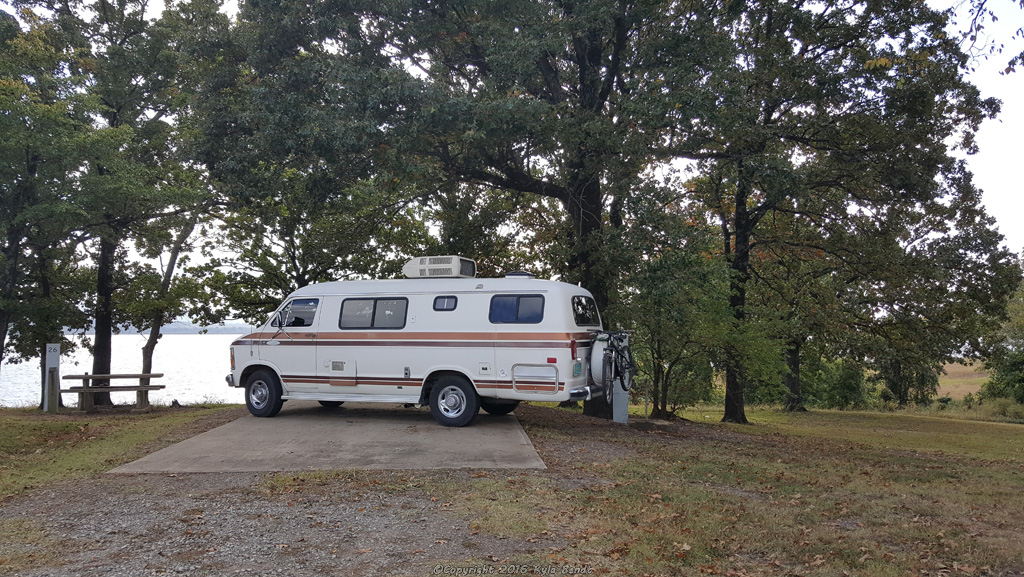
When I park the van at an RV spot, I like to aim for the best views out the front window and side door. I also consider the privacy aspect of being able to keep the side door open if I want to. I don’t feel like I have to utilize the spot as intended. The van doesn’t have any fancy auto-leveling system, so I did buy leveling blocks but never actually used them. After a while, I developed a very good sense for when it was parked level. Of course, it’s not a challenge at a spot with a flat concrete pad, but some of the places I go in the woods are different.
Hook-Ups
Some of these things are probably obvious (or should have been). Some things I’ve learned the hard way.
Water
The van has two options for water- hooking it directly to a water hose that pressurizes the system, or filling the water tank and running the water pump. I always preferred just to fill the tank and run the water pump. I once read a post on a RV forum about somebody with a brand new, very expensive RV that flooded on their way home from picking up the RV when a connection came loose under the sink. They were driving with the water pump on, so it continued spewing water out and they didn’t notice until the whole thing was flooded and very damaged. So, I always try to make sure and turn the pump off when I’m not using water, especially when driving since the vibrations going down the road make a connection coming loose more likely.
I like to travel with the water tank at least partly filled up. Often, I don’t know if I will be making it into an RV park for the night where I will have water, parking in the National Forest or where I will end up. So I like to be prepared with enough water to make it through a day. The down side of this is that it means extra weight.
I also added a small accumulator tank to the water system when I had to replace the water pump. It did help to keep the pump from cycling quite as much when running and also had the added benefit of keeping just enough water under pressure that I could wash my hands without turning the pump on.
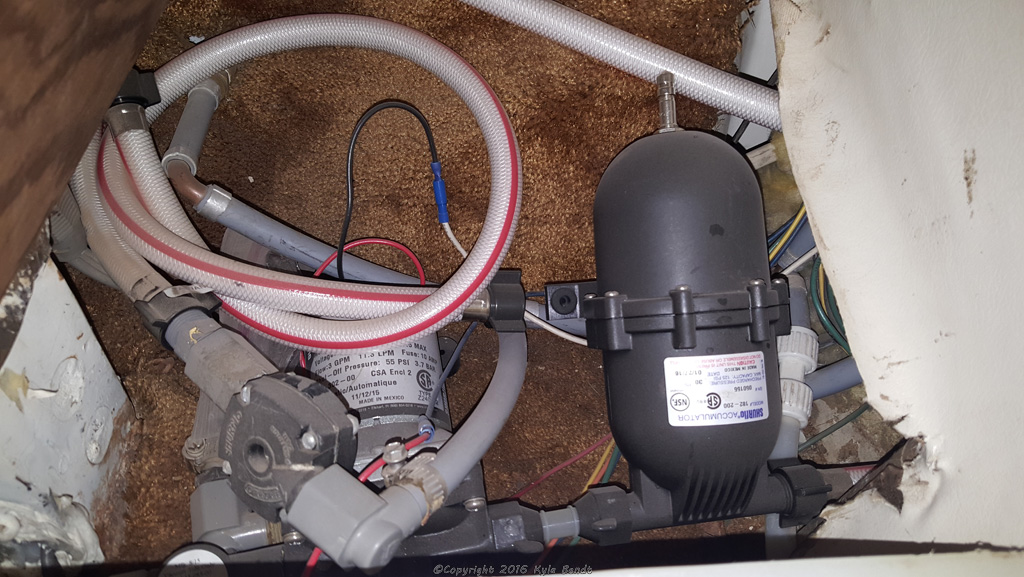
One last thing regarding water is to screw the ends of the water hose together when putting it away since this keeps out dirt and keeps the water left in the hose from getting the storage area wet.
Electric
Plug the end of the power cord that goes into the van in FIRST. I only made the mistake of doing it the other way once because after plugging the cord in, I shocked the heck out of myself with the end that plugs into the van. Certainly not my brightest moment, although one of the more electrifying.
Sewer
Make all sewer connections TIGHT. This includes the fittings that go on the sewer hose. Even if you’re only putting the fitting on the sewer hose to dump the toilet once and then planning on buying a new hose. Trust me. And when you go to put the sewer hose in it’s storage compartment, no matter how much you’ve held it up to let it drain, stand back a little. As it compresses, a little more ‘water’ will always squeeze out.
There is one standard size for fittings for RV sewer hoses. My van was graced with fittings on the end of the drain pipes that are not that size. It took me some time to figure out that it is only compatible with Thetford brand fittings, which are always more expensive. I was just glad when I finally found the ones that would fit. It would be possible to change out the fittings on the end and everything would be standard, but I haven’t done that.
Pre-Driving Checklist
There are an annoying number of things that need to be done to make sure the van is ready to go. It seems to start growing the roots the second I park and it becomes increasingly harder to actually go someplace in it. I have kind of a mental pre-driving checklist, but it seems that I frequently forget to do something on it like making sure the closet doors are latched. Then I’ll be driving down the road and the closet doors will be swinging since I forgot to latch them. They’ll make an annoying noise and block what little visibility I had out the rear-view mirror. Perhaps actually putting my checklist on a very visible place by the driver’s seat would help. Anyway, the mental checklist is as follows:
- Close AND LATCH closet doors.
- Turn off water pump.
- Check that caps are on black and grey water outlet tubes & valves are closed. Caps should NOT be loose on running board where they will fall off, I’ll drive over them loudly breaking the tabs that hold them closed and have to replace or repair them. (If little wires that hold caps on so they don’t end up loose on the running boards are broken, make note to self to repair.)
- Check that bike is secure.
- Walk around van and make sure everything is unplugged, latched, attached, inside, etc.
- Check area to plan escape plan…er… how to back up.
- Open curtains, even the side ones I don’t look out very often because once in a while that visibility makes a difference.
- Make sure fridge is set to the right setting.
- Make sure vent in bedroom and all windows are closed if heading down dirt road to keep out dust.
- Make sure everything is put away in a secure spot.
Driving
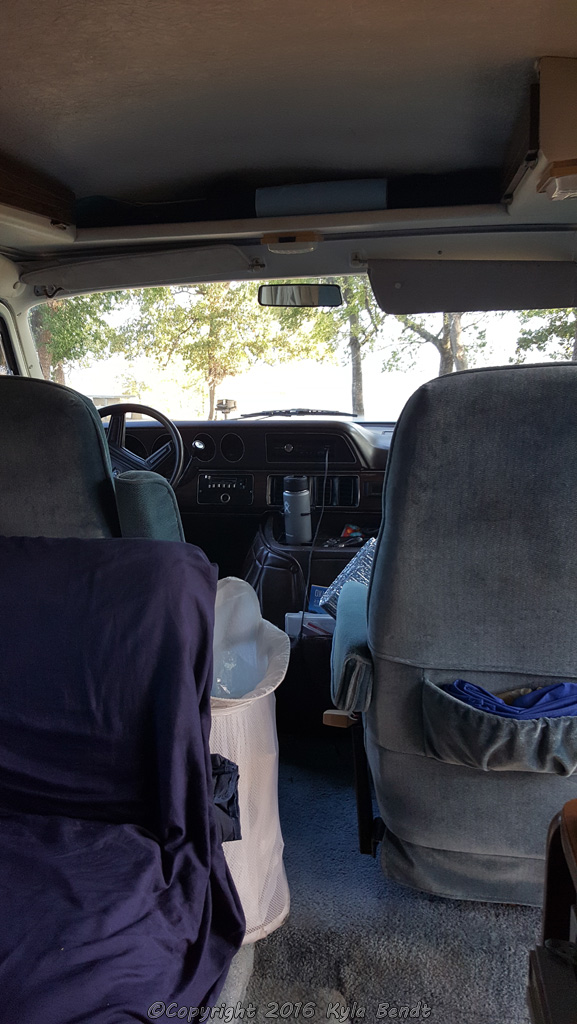
Annoyingly, the van didn’t come with any cup-holders. It does have two round divets in the center console thing that make one think it’s a good place to put a cup, but any beverage set there will go flying. I did find a couple of cup holders on Amazon that I velcroed on that work surprisingly well.
One thing about the van is that it likes to road-walk. It’s also very hard to control in the wind. It helps to look further down the road and aim to make very minor steering adjustments rather than look too close in front of it. The steering is just slow to respond, which makes it easy to over-correct causing more problems.
Bluetooth headphones. OK, so probably I shouldn’t be on the phone ever when driving. Sometimes, I just am. One day, I’d like to upgrade the stereo to something that is Bluetooth enabled, but until then, my Bluetooth headphones make a big difference.
The gas gauge on the van is weird. I think it actually had a larger gas tank put on it when it was converted into and RV (to help the range on it since it’s heavier with the RV mods). Once G had it completely empty and we took it to the gas station and recorded what the gas gauge read as we put gas in it. I later lost the paper we wrote it on, which I have always kicked myself for. Anyway, I do remember that it stays at ‘E’ for the first 8-10 gallons. From driving it, I know that I get about 100 miles on the top half of the gas gauge and about 40 on the bottom half of the gauge.
The Bedroom
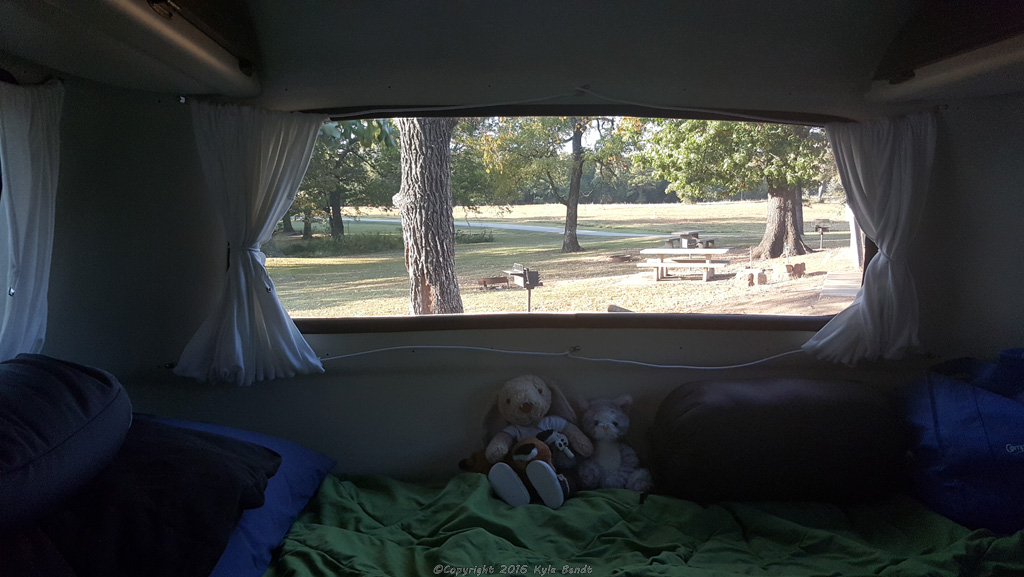
The bedroom is one of the things I love about the design of my van. It seems like the other Class B RVs I’ve been in don’t have a dedicated bed, but rather dining booths that turn into a bed or a similar convertible situation. The back of my van was extended slightly, allowing for the bed to go in the back.
There is also a little storage space on each side of the van above the bed. This is were I like to keep extra towels, a couple of books, Hoppy’s travel bag and toiletries that don’t live in the bathroom.
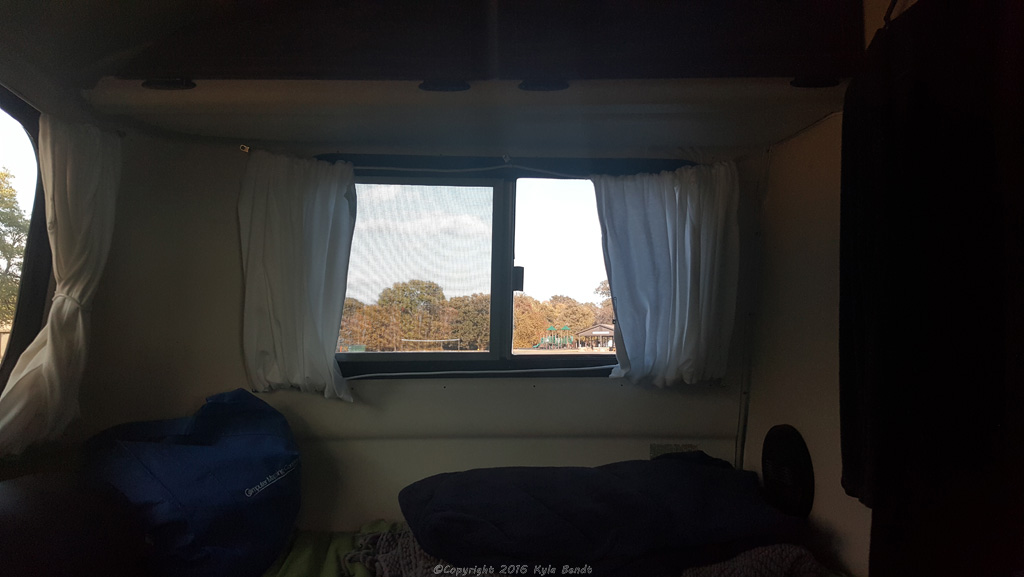
I like to take my sleeping bag with me and plenty of warm blankets. If I have trouble with either the auxiliary battery that powers the RV things in the van or with the propane system, I can’t run the heater. So, I like to know that I am prepared and can stay cozy if need be.
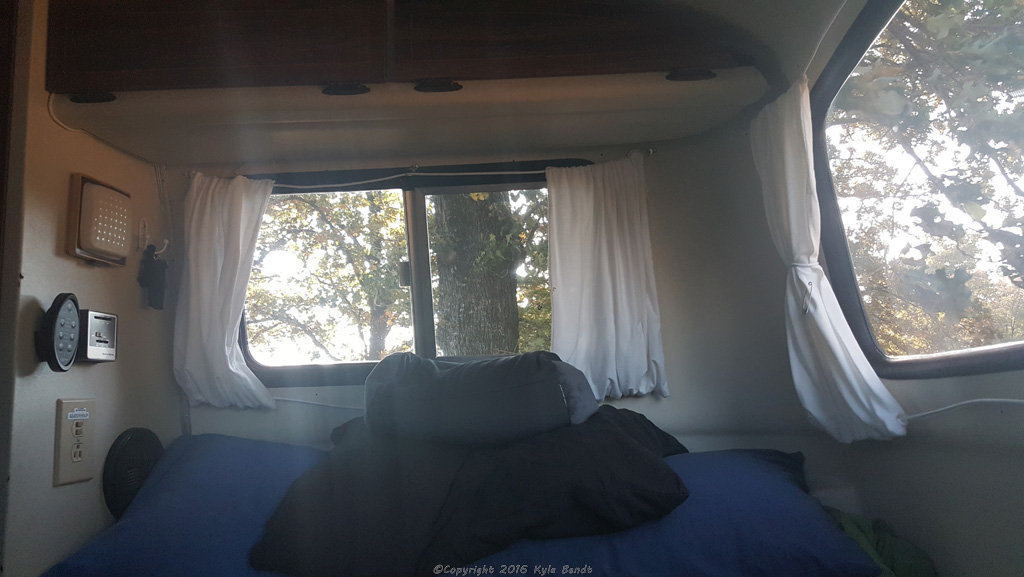
I love having the thermostat right next to the bed. No having to get up in the cold mornings, simply turn the heater on and wait a few minutes. 🙂
There are also speakers by the bed. I always wanted to get the radio hooked up to the auxiliary battery rather than the other battery for the van so I could listen to music without any worries about draining the battery. (I have no idea how long I could listen to the radio before this would be a problem anyway.)
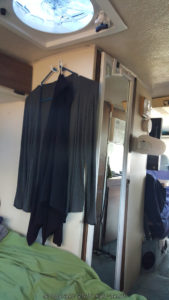
I recently added a hook to the wall so that I had a place to hang a jacket or two. (Ironically, I broke the clothes hanger I had with me in the process of putting the hook up.)
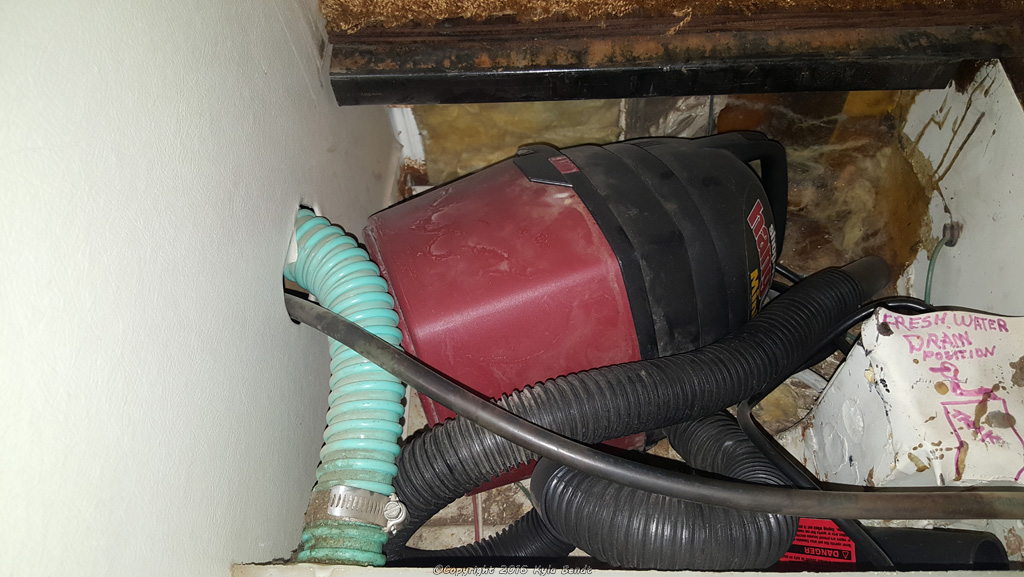
Under one side of the bed next to the water tank is the water pump. Under the other side is a little space that I found was just big enough to stash the smallest Shop Vac I could find. It has sometimes been useful, but I think I also love it because it is so adorable and just a perfect fit.
The Closet
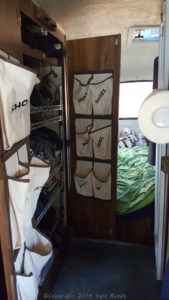
The closet in the van had a clothes rod in it when I got it. But it is too narrow for clothes hangers. For a while, I did buy kid’s hangers to put in there, which worked OK, but still didn’t make the best use of the space. Eventually I put shelves in there instead which have worked a lot better. They were always intended to be kind of temporary since they don’t actually attach to the van. My idea is (was?) to replace the shelves I put in them with permanent shelves that are actually mounted to the van. The ones I have in there work, but don’t quite take full advantage of the space since the back wall of the closet is not straight up and down but rather rounded.
The ‘shoe’ thingies on the doors are not large enough for even my shoes and I have pretty small feet. And they are very ugly. I always meant to take them off, but haven’t yet.
The Bathroom

The bathroom in my van is pretty much miniature. I can’t stand in it, and sitting in there, my head is a couple inches from the ceiling. It’s also very hard to get pictures of it, because it’s impossible to stand far enough back to get a very wide view of anything.
The Shower
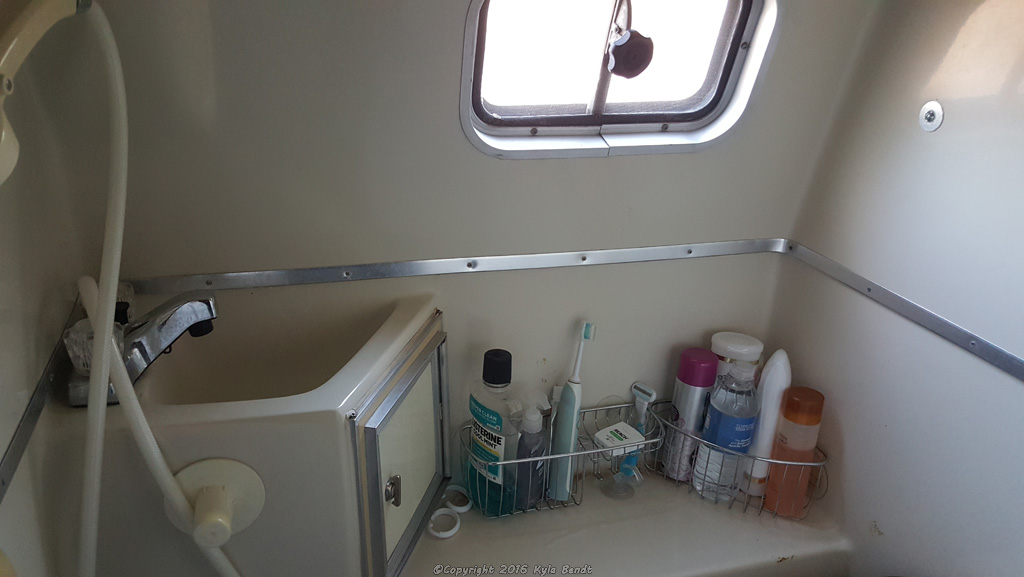
I found these little wire baskets with suction cups at Wal-Mart not long after buying the van. They have been one of the most useful things to have to hold all of the shower/bathroom stuff that I don’t want sliding all over. Of course, I only put things there that can get wet since everything does indeed get wet during shower time.
In the upper right hand corner of the picture, you can also see one of the bolts used to attach the monitor to the other side of the wall. It’s also got a washer and a bit of silicone.
I always light the water heater a while before I want to shower and then turn it off before I actually get in the shower. The tank holds enough hot water to last through a quick shower and I don’t want to use up propane heating up more water once I’m out. One cool feature about the van is that the coolant from the engine circulates through a heat exchanger in the water heater to heat up the water when driving down the road. This make for hot water upon arrival at a destination without ever having to light the water heater.
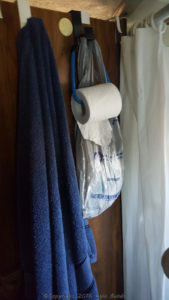
When I First bought the van, I found that water would leak from the bottom of the door into the hallway when I’d shower. So I bought the shortest shower curtain rod I could find and cut a shower curtain to size. The shower curtain is wider than needed, so I can also wrap it around my hand-towel to keep it dry too. The shower curtain also has the benefit of keeping the things that hang on the door dry- my towel, TP and very fancy trash can.
Also, the shower drain kept getting clogged with hair. At one point my needle-nosed pliers lived in the bathroom for cleaning out the drain. Eventually, I found a little cover for the drain to prevent this problem and it has worked great.
Another thing I have found helpful is that when I turn the shower off, I will pull up on the little pull thing on the sink and put the shower head on the floor to let any remaining water drain out of the hose for the shower head. This makes it so that when I turn the sink on later water doesn’t drip out of the shower head onto my feet.
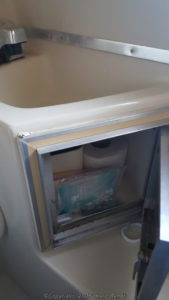
The van does have a control panel that allows one to check fresh water and propane levels, the battery charge and turn on the water pump. It also has a button for checking the grey water level, but it always reads ‘E’. I’m pretty sure it was never hooked up to the holding tank. I discovered this early on in my van ownership days when the kitchen sink wouldn’t drain and I found water had come up the drain in the shower and was covering the bathroom floor. So, I set out to dump the tank for the first time in the dark with no idea what I was doing. I now know that the holding tank will hold a day or two’s worth of water and approximately the same amount of water that the fresh water tank holds. I try to always dump the grey water before driving the van anywhere as it just means less weight for the van to haul around.
There is also a little under-the-sink cabinet where I can store a few extra things.
The Toilet
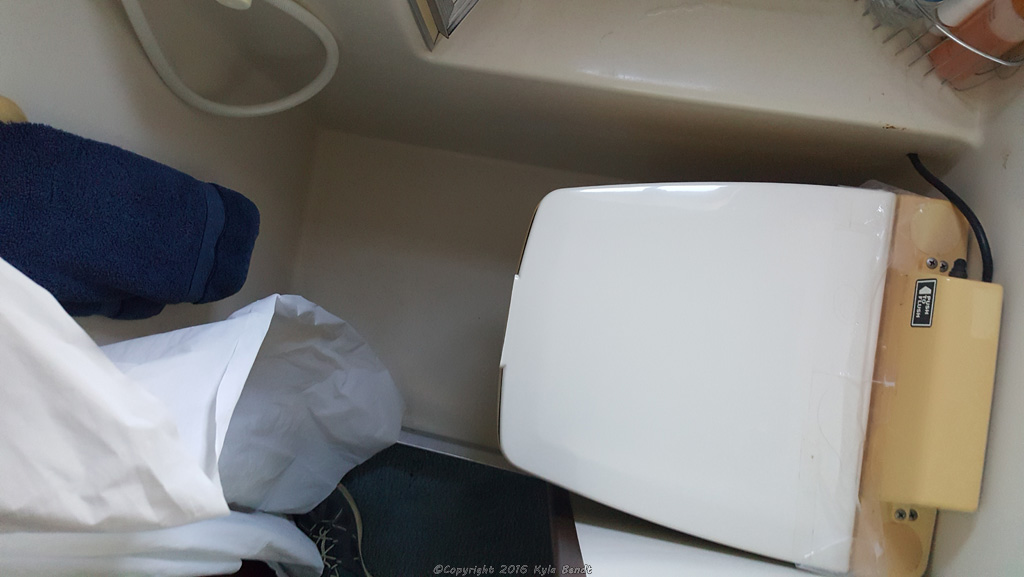
I know WAY too much about the toilet in here. I have taken it out of the van and taken it completely apart, replacing many of the parts. One thing I can say is that the bolts that attach it DO NOT work as specified in the owner’s manual for the toilet. I spent a considerable amount of time trying to follow those instructions to remove it, only to discover later that the parts I was trying to get apart had been welded together. (Those instruction probably are right for most installations of this type of toilet, but on the van, there are two nuts on two bolts under the van that must be taken off and then the whole toilet lifts right out.)
The plastic has yellowed with age and looks kinda gross, but RV toilets are expensive. I did replace the lid and seat which was also insanely pricey. The new one was obviously not as well built because the lid cracked a little when I was showering a day or two after taking the above picture. I’m not pleased about it, but not sure I’ll do anything about it. Another replacement would probably just have the same thing happen.
The clear plastic on the back is on there because otherwise water from the shower runs into the toilet, which means the black water has to be dumped more frequently which is a pain. It’s not a very clean-looking solution, but it works.
I did find that it’s best to use the harsh chemicals for the toilet with the warnings about cancer, birth defects and reduced sperm count. They make ‘natural, biodegradable’ versions that sound nicer, but don’t work well.
I have had trouble with the toilet flushing on a couple of occasions, probably due to a loose connection. The easy hack on that is to use the shower to ‘flush’ it. Also, it wants an initial charge of water before use, but one can forgo that and use the shower to flush when needed until the liquid level hits the minimum to run the pump. This has the advantage of making it so that it’s longer before the black water needs dumped.
The Kitchen
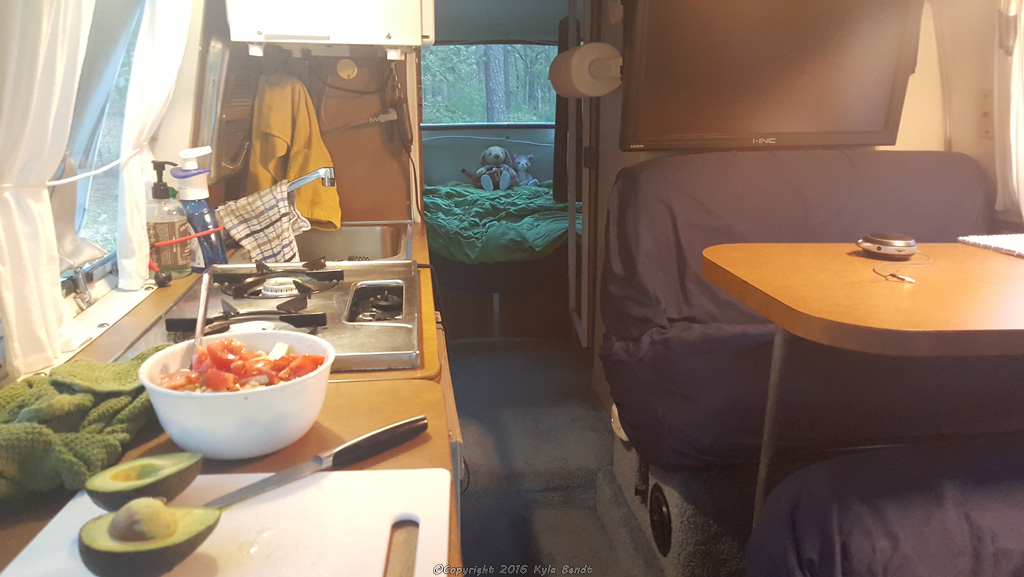
There is an extension to the counter top by the sink that folds down. (You can’t get out the door with it up.) It doubles as a counter-top and a table for when the passenger seat is swiveled around to face the back of the van.
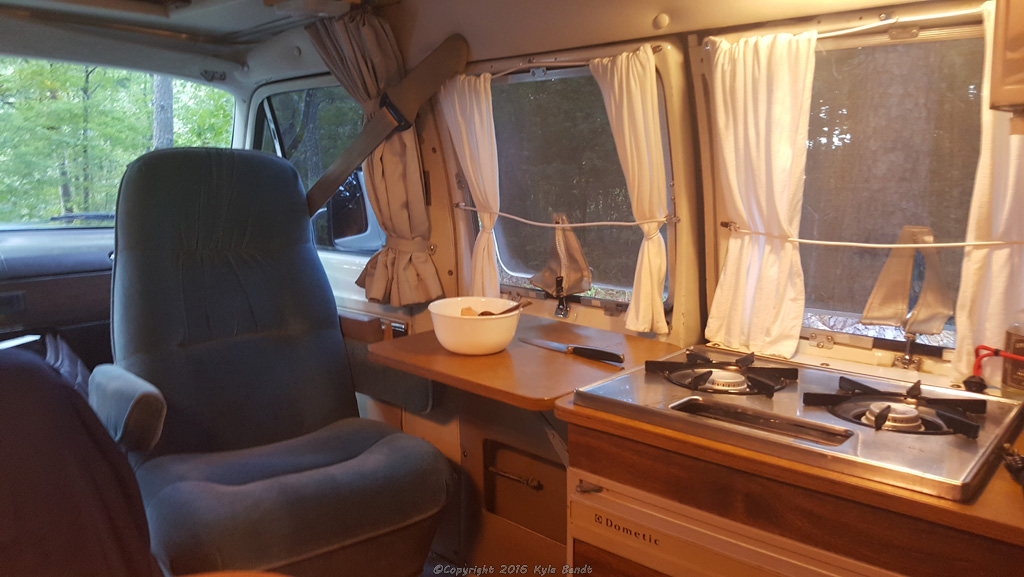
A lot of times I don’t bother to turn the passenger seat around, but when I do I remember how much more comfortable it is than the dining booth.
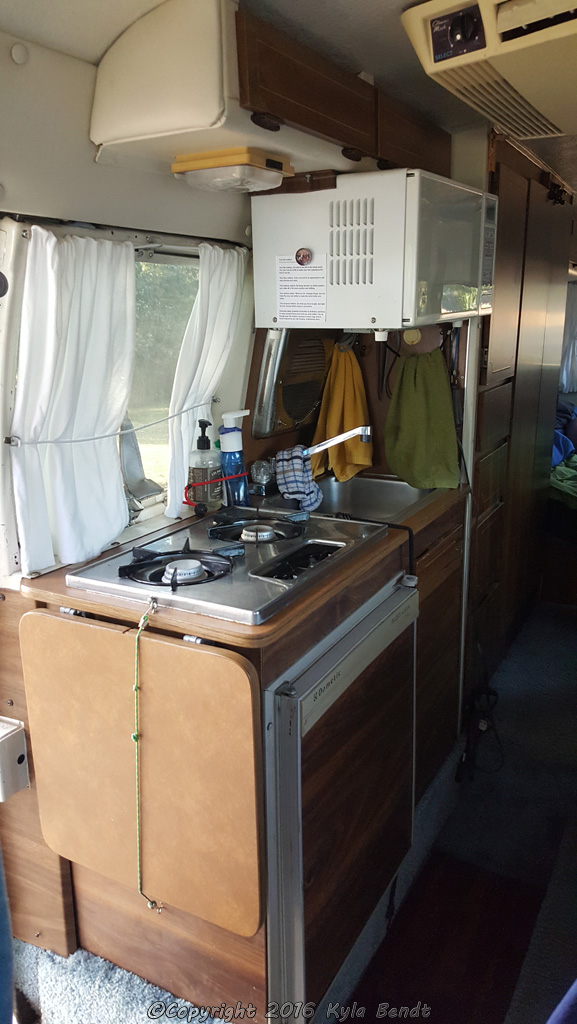
The kitchen in the van has everything one could need- a stove, fridge, sink, microwave, a little storage and even a vent fan for the stove. The vent fan over the sink never quite sealed right, so I added some of the bubbly aluminum coated stuff that I used to make window covers to the ‘door’ on it. That helped a lot.
I can’t talk about the kitchen without talking about coffee. I have a metal french press that I take with me in the van. I ordered the metal one after having a glass one smash on the floor of the van. Plus it’s insulated. That way when I’m parked off-grid, I can heat water in a pan on the stove and still make coffee. Actually, I use the french press at home too just because it makes good coffee. I did try buying a hand-crank coffee grinder for fresh ground coffee when I was off grid, but the thing didn’t work that well. Now I go for either buying ground coffee or grinding it when I do have the van plugged in somewhere and storing it in a container.
The thingies that go on the burners for the stove rattle when going down the road, so when I remember, I’ll take them off so I don’t have to listen to them. At one point, I had a little bit of hot glue on the points where they contact the stove top and that helped, but eventually the hot glue fell off. I would maybe replace the hot glue if I end up keeping the van post engine catastrophe.
There isn’t a lot of space in the van, so it’s pretty essential to just do the dishes right away. Early on, I bought the cutest little RV dish drainer. There wasn’t really a place to put it though, so it was soon ditched. Now, I just put a towel on the table and set the dishes on there and then dry them as soon as I’m done washing them. Speaking of dishes, I keep them to a minimum- a couple plates, bowls and cups, some silverware, a can opener, a frying pan, a sauce pan and a few containers that nest inside each other.
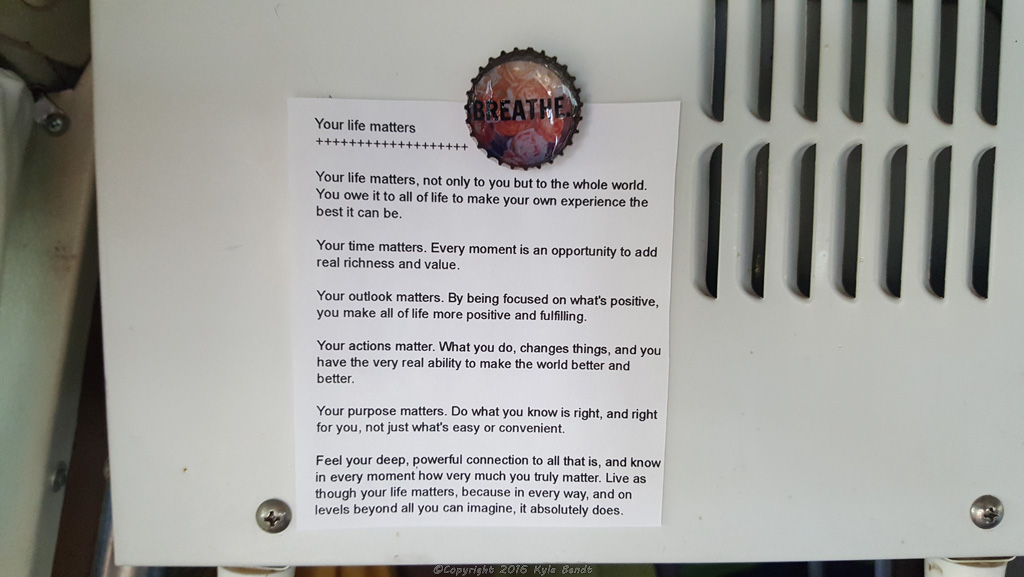
I rarely use the microwave and have thought about taking it out. It is a hazard for bonking my head. Speaking of which, there are many things that are hazards for smashing my head in the van including the lights and most especially the doors on the overhead storage areas when they are open. The microwave is however a good place to hang a Daily Motivator that I liked with a magnet I got at a yoga retreat.
The Fridge
The fridge is a 3-way fridge that will run off of propane, 12-volt, or AC power. I have occasionally had problems with it staying lit on propane. Mostly these problems were fixed by taking it apart and cleaning some of the pieces. Sometimes it will still blow out on extremely windy days. It does have a vent on the outside of the van above the access panel for the fridge and a quick way to check if the fridge is still lit is to feel if that vent is warm.
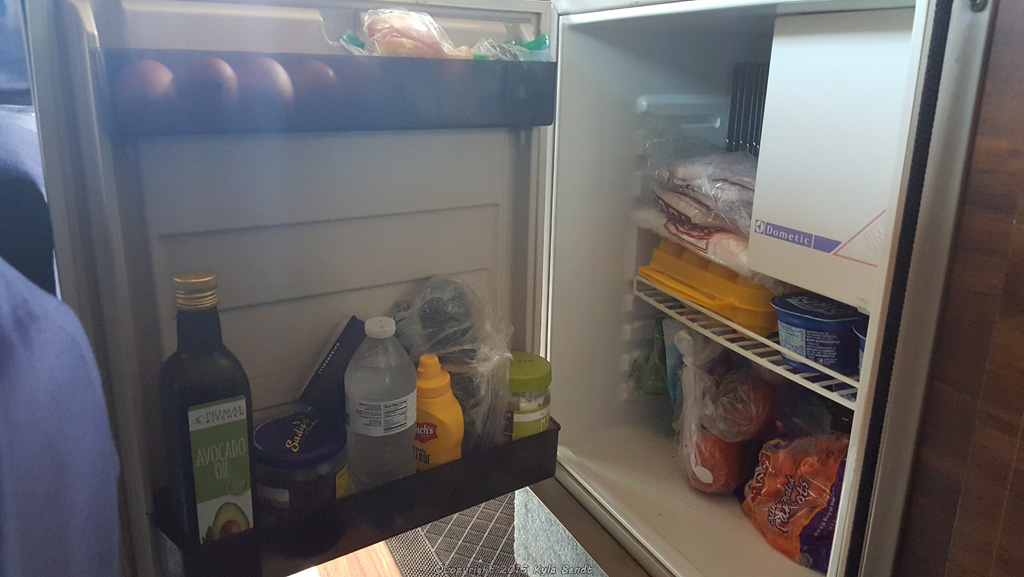
The fridge is pretty tiny, but it’s enough to keep a few things. I found it hard to fit normal egg cartons in there, but found a plastic egg container for camping that has a 3×4 dimension rather than the standard 2×6 of normal cartons that fits a lot better.
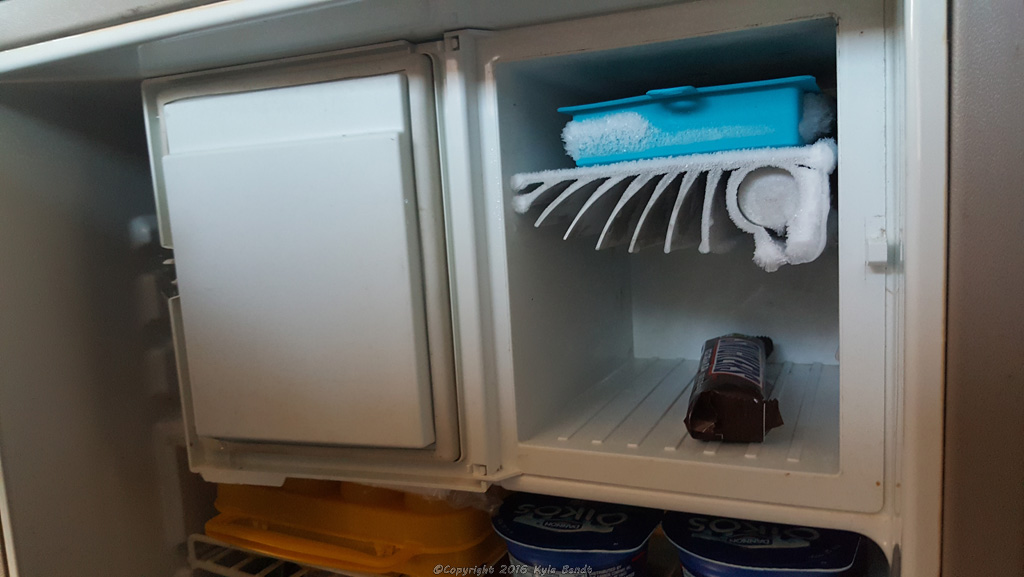
I even have a miniature freezer. (The ice cube tray is completely frozen to the cooling element.) My Ice Cream Snickers bar on the other hand was in good shape. 🙂
Dining Area
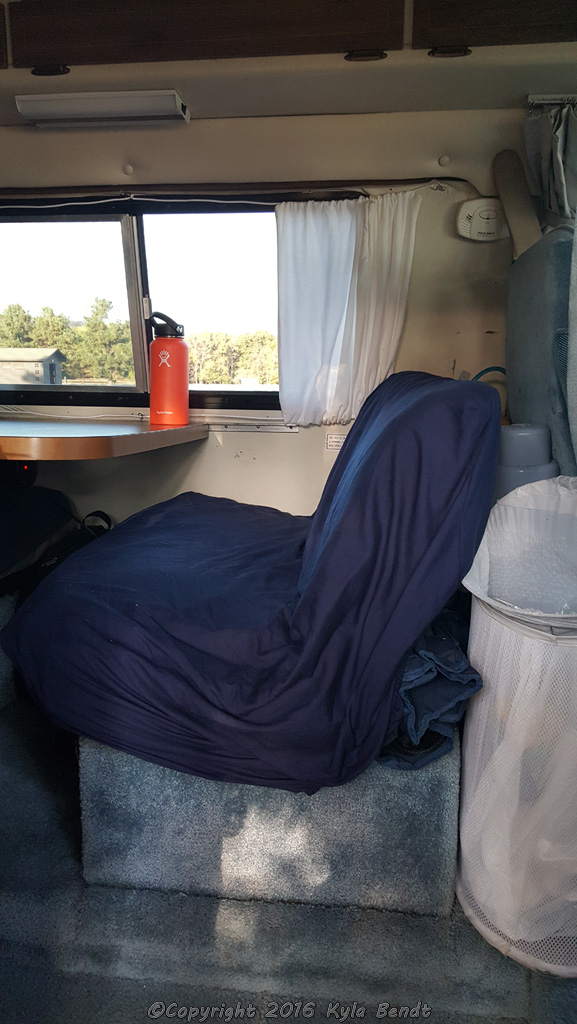
The benches for the table also lie flat to turn into a twin bed. Since the two seats are designed to also convert into a twin bed, I bought two fitted twin sheets and folded them in half to make my seat covers. The front seat will also rotate around to face forward so that passengers can ride there (two to a bench means that the van has seatbelts for six.) My trashcan also lives here. It’s really a collapsible laundry hamper that I put a trash bag in. I loop it over the armrest for the driver’s seat so that it doesn’t go sliding around when I’m driving. This way I can reach it easily when I’m cooking or when I’m driving down the road.
I prefer drinking filtered water to drinking the water from the RV tank. One reason for this is that I can be lazier about disinfecting the water tank. The other is that tap water can vary in taste widely across the country. I found a little hand pump that attaches to the bottle to make it easy to dispense. It happens to fit perfectly behind the dining booth with a second water jug, my yoga mat and a folding camp chair. The camp chair used to live in the storage area that’s accessible from outside, but I found it so much nicer to have it handy.
There isn’t much room behind the other seat, but there is just enough to store the window coverings I have. They are made out of reflective foil insulation that velcros to the inside of the windows for extra insulation in really hot and cold months.
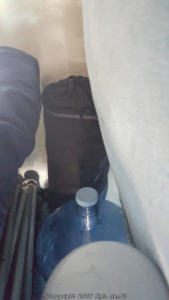
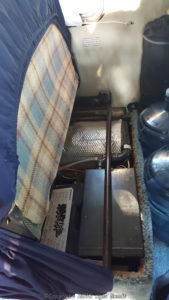
Both seats lift up, but there isn’t much space under the rear one since that is where the heater is. The other seat has a little space under it where I keep a few tools. (I try to pack light, but tools is not a place where I skimp. I have a second toolbox that I carry in the back storage area.) It also houses the water heater and auxiliary battery.
Outside
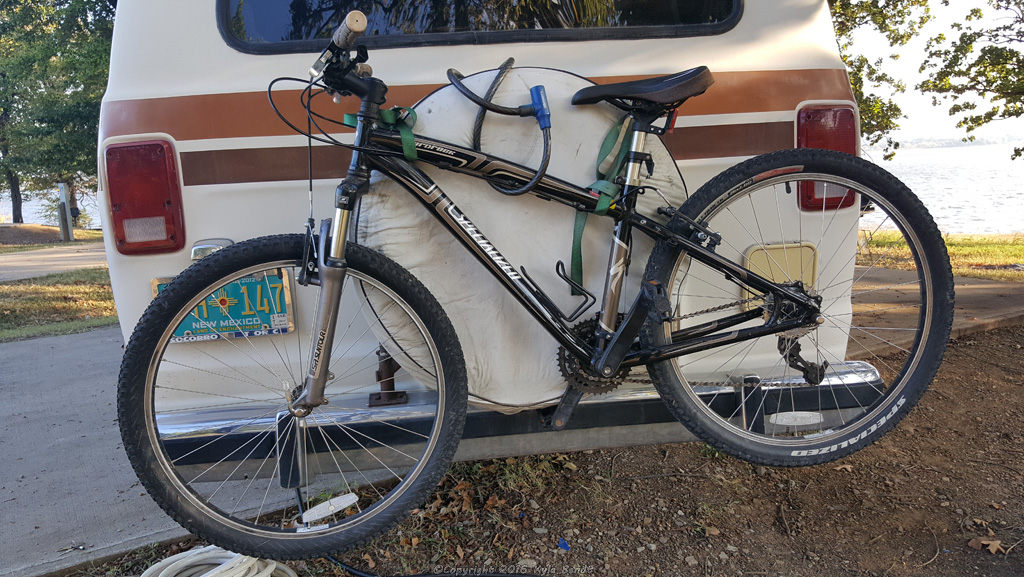
My bike goes on the back of the van. It’s really just attached with two straps that go around the mount for the spare tire. Plus I lock it on so nobody steals it. The spare tire swings out to give access to a storage compartment that is under the bed. The storage compartment is home to my water hose, electrical cords, extra tools and some other miscellaneous things. There is a second access to this compartment on the side of the van.
The van also has a little porch light by the door. I have found it handy at times when bugs get in the van that are attracted to light. I’ll turn off the lights in the van and turn on the porch light to try to draw them out.
The van also has a great awning. While I haven’t used it very often, it has been really nice once or twice, especially when it’s raining and I want to chill outside.
This post has come out to be longer than I expected, but I wanted to share all that I’ve learned over the years with my van. While I am now contemplating selling it, I’ve had a ton of fun with it and am so grateful that I had it.

Oh no! Any updates on the camper?
I sold it after the engine threw a rod. I sometimes regret that decision though – I wish I’d just paid to replace the engine. On the flip side, it was an older vehicle and maybe someday I will get something a little newer/safer.
Hello Kyla, I am considering van life, and have been shopping around for vans. There’s a guy in CO, who is selling this same van you had. So after reading your blog, it seems like there was a lot of maintenance and upkeep (which is to be expected in an older van). From the pictures, he sent me, I can tell it’s going to be a lot of work of cleaning it, getting new tires, and figuring out how everything works. In my heart, I have a feeling I will want to gut it out and start over. Can you offer any advice before I jump headfirst into making this purchase? Just out of curiosity, Are you still doing van life? Would love to get a response. Thank you for sharing your experience.
Thank you so luch Kyla for this thorough tour with tips and tricks. Makes me understand more and more about the feeling of being in there.
I am about to get an 228 myself, for camping/touring with the family but also as my daily commute.
Being in the airlines makes me to be not further than one hour away from base when on reserve, so instead paying a stinky crash pad I will use this one and have a blast 🙂
I will keep reading more, I started from the beginning…yup, have read all through, and will keep reading. Keep it coming, Kyla!
Alfredo-
You must be excited to be getting your 228 soon. It sounds perfect for what you want it for. I think having your own space is much preferable to renting somewhere. Plus I’m sure the family will enjoy camping in it.
I’m glad to hear you’ve found this useful.
Hi Kyla,
Thank you for your reply.
I showed this site to my wife, and she read through most already as well. And it helped me a lot as now she realizes that I am not crazy about the van idea… though she knows that I am crazy in general… in a good way 🙂
It gave us more ideas in what to look for when it comes to mods to do on the 228, the layout, and in general it gave us a good feeling of how it must be like to be in the 228 for extended periods of time. Very helpful, and again, very thankful for this, Kyla!
Happy Thanksgiving, to you, and to all the natives too!
(My wife is Cherokee.)
Alfredo
Hi Alfredo,
Glad your wife has enjoyed reading here too.
A late Happy Thanksgiving to the both of you!
-Kyla
Thank you for this information. I have a 1979 228 and i love it. However how do I dump the toilet? I have tried everything! It’s only got water in it as just bought the vehicle and tried the flush. There’s a knob like thing at base of toilet. I’ve pushed, pulled, twisted and still it won’t dump. What am I doing wrong? Winterizing it and want the water out. Please help. Thanks
Hi Diane,
On my van at least, there were two valves for dumping the toilet. One on the base of the toilet which you pull to dump. The second one is outside the van where the drain pipe goes. Both valves must be opened for the toilet to drain.
The owner’s manual for the toilet can be found here: https://www.thetford.com/wp-content/uploads/2015/03/Owners-Manual-Electra-Magic-Model-80.pdf
There is also a second drain pipe on the outside of the van – this is for the grey water from the sinks and shower.
Hi Kyla –
My son has the same camper and is in the process of restoring – do you know where to order water pump etc to get water from holding tank working?
thanks – I am at a loss but trying to surprise him for christmans
Hi Lauren-
Yes, looking back at my Amazon history, I ordered the following items when I replaced my water pump:
Pump: https://amzn.to/2LlGkUx
Strainer: https://amzn.to/2rJOUDH
Accumulation Tank: https://amzn.to/2R7sVoF
Flexible Tubing: https://amzn.to/2LmxOEH Using the flexible tubing between the connections helps to dampen vibrations and noise from the pump.
These are Amazon affiliate links.
Let me know if you or your son have any other questions.
Your van is bigger than I imagined it to be, and looks quite cozy — an awful lot like mine, really! I’m sorry it’s blown up on you. That sounds like a painful decision to have to make — I hope whatever you decide works out for you.
It always seems bigger to me on the inside than one might imagine from the outside for some reason. And I still don’t think I’ve seen pictures of yours (wink, wink, nudge, nudge).
Kyla, thanks for taking the time to write/post this. I loved every word. Your van is such a classic I would hate to see it sent to the wrecking yard. If you do decide to sell it, hopefully someone will buy it who loves it as much as you.
Cheers….Vince
Vince,
I’m glad you enjoyed the post. I still haven’t figured out what to do with it yet. For now, I’ll start with looking into prices for transporting it back from Texas- something I really need to get around to doing in the next day or so. I do totally love it still.
-Kyla